If you work in product labeling—like I do, as someone who’s spent years making multi-layer labels for everything from skincare bottles to pharmaceutical packaging—you know adhesion strength isn’t just a random metric. It’s the difference between a label that stays put through a cross-country truck ride, a hot warehouse, and a customer’s shower, vs. one that peels off mid-shipment or comes unstuck when it matters most. Over the years, I’ve tested hundreds of our own labels and seen way too many clients scratch their heads about which test actually matters, and which is just overcomplicating things. Today, I’m breaking down how to test adhesion strength for multi-layer labels the right way—no stuffy lab jargon, just the real stuff we use in our shop every day. Multi-layer Labels
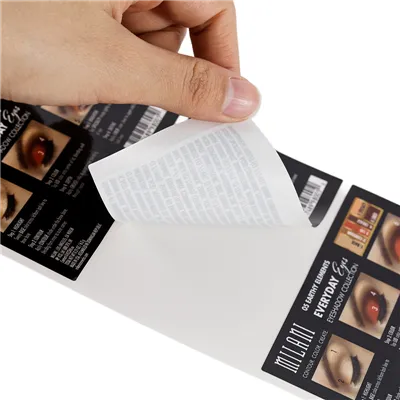
First, let’s get one thing straight: multi-layer labels aren’t single-layer stickers. They’re built for a reason—think tamper-evident layers, moisture barriers, or even hidden product info under a top layer. So their adhesion strength has two big parts to worry about: the bond between the label’s own layers (called “layer adhesion”) and the bond between the label’s glue side and whatever surface it’s stuck to (called “substrate adhesion”). Messing up either one is a disaster. I’ve had a client come to us once because their labels peeled off the shampoo bottle mid-shelf restock—turns out their substrate adhesion was too weak. Another time, a food brand had their tamper layer pop off in transit because the inner layers didn’t stick. Both were avoidable with the right tests.
Let’s start with the basics: what you actually need for testing, beyond just a tape roll (though cheap tape won’t cut it here). If you’re testing in a small shop like ours, you don’t need a fancy lab (though we do have a basic pull tester). Here’s the gear we use: a digital pull tester (you can get a mid-range one for under $500, way cheaper than wasting money on bad batches), 1-inch-wide test strips (since label rolls are usually standard width, this fits), a controlled temperature/humidity chamber (super important because heat and moisture wreck adhesion—if you skip this, your test results are useless), a clean surface (we use stainless steel, glass, and plastic—since those are the most common substrates our clients use), and a stopwatch.
Wait, why controlled temp and humidity? Let’s be real: a label that sticks fine in a 60°F office will fall apart in a 90°F warehouse in Florida. Or a label that tests great in dry conditions will fail in a humid grocery store. That’s why we always condition our test samples first. The standard we follow is 23°C (73.4°F) and 50% relative humidity for 24 hours before testing. If your client’s labels are going to be shipped in a container that hits 120°F, you should condition samples at that temp for a few hours first—don’t just test at room temp, that’s a rookie mistake.
Now, the tests. First, the one almost everyone knows: the 180-degree peel test. This is the main one we use for substrate adhesion, and it’s straightforward. Here’s how we do it at our shop: we take a test strip, cut it to 5 inches long, then peel back the first 1 inch of the label to expose the glue. We stick that 1-inch section firmly to the test surface—we press down 5 times with a 2kg roller (that’s just a standard steel roller we made, no fancy equipment) to make sure there’s no air bubbles under the glue. Then we let it sit for the required time: most clients test after 1 minute, but if their product sits on a shelf for weeks, we also test after 24 hours. Then we clamp the peeled end of the label into the pull tester, and set the angle to 180 degrees (so the label pulls back parallel to the surface), and pull at a speed of 12 inches per minute. The pull tester will give you a reading in ounces per inch (oz/in) or Newtons per meter (N/m)—we use oz/in because it’s easier for clients to wrap their heads around. A good multi-layer label for general use should be at least 30 oz/in; if it’s for a wet surface like a water bottle, we aim for 40 oz/in.
But wait—this test only tells you how well the label sticks to the surface, not how well its own layers are stuck together. That’s where the cross-cut test (also called the tape adhesion test) comes in for layer adhesion. Multi-layer labels have layers like facestock, adhesive, maybe a barrier layer, and a release liner. If those layers separate, the label is useless—tamper-evident layers will pop off, hidden text will be lost, etc. The cross-cut test is super simple. You take a test label, cut a grid of 1mm x 1mm squares through the top layers (not all the way through the glue), so you have 100 small squares. Then you press a piece of standard pressure-sensitive tape (we use 3M 810, it’s consistent) onto the grid, rub it firmly with your thumb to make sure it sticks, then peel it off quickly at a 180-degree angle. Then you count how many squares came off with the tape. If less than 5% came off, that’s great—your layer adhesion is solid. If more than 15% come off, you’ve got a problem, and you need to adjust how you’re laminating the layers together. We do this test every time we make a new batch, and every time a client’s order changes—like if they switch to a thicker facestock, we have to re-test layer adhesion because thicker material can mean weaker bonds.
Wait, but what if the label is used on a curved surface, like a pipe or a round bottle? The peel test we just talked about is flat, so it doesn’t account for bending. That’s why we also do the shear test for some clients. The shear test measures how much force it takes to pull the label off the surface when it’s being pulled parallel to the surface (instead of 180 degrees). Here’s how we do it: we stick a label strip to a stainless steel plate, let it cure for 24 hours, then hang a weight from the end of the label. We use a 1kg weight for general use, 2kg for high-stress applications. We time how long it takes for the label to peel off. A good label should hold the weight for at least 24 hours—if it falls off in less than an hour, the substrate adhesion is way too weak. We did a shear test last year for a construction company that needed labels on pipes that get cold and vibrate—they needed the label to hold a 1kg weight for 72 hours. We adjusted our adhesive and layer lamination, and their labels worked perfectly.
Now, let’s talk about common mistakes we see clients (and even other label makers) make when testing. First, not conditioning samples. I can’t tell you how many times someone has sent us a test result that’s way too high because they tested a label straight out of a 40°F warehouse in the winter—wait until it’s at room temp, same as the actual conditions it will be in. Second, using the wrong angle for the peel test. Some people test at 90 degrees, which is easier, but it’s not the same as a label being pulled off a curved bottle—180 degrees is the correct angle for real-world use. Third, not testing both layer and substrate adhesion. I had a client last year who tested substrate adhesion and thought it was great, but they didn’t test layer adhesion—turns out when the label got wet, the inner layer peeled away from the top layer, so the barcode was unreadable. They had to throw out 10,000 labels because they skipped that test.
Another thing: durability testing. Adhesion isn’t just about initial stick—what happens when the label gets wet, or gets scratched, or sits in the sun? For labels that go on food packaging, we do a water immersion test: stick the label to a plastic bottle, submerge it in room temp water for 24 hours, then peel it off and check if any layers separated, or if it leaves a sticky residue. For outdoor labels, we put them in a UV chamber for 100 hours (that’s equivalent to a month in direct sun) and test adhesion after that. We even have a machine that vibrates labels to simulate shipping—shake them for 2 hours on a truck-like vibration, then check if any layers are loose.
At the end of the day, testing adhesion strength for multi-layer labels isn’t about following a bunch of rules—it’s about matching the test to how the label will actually be used. If you’re making a label for a soup can that sits on a grocery store shelf, your tests can be a little less intense, but if you’re making a label for a pharmaceutical vial that needs to stay intact through shipping and storage, you need to test every single aspect.
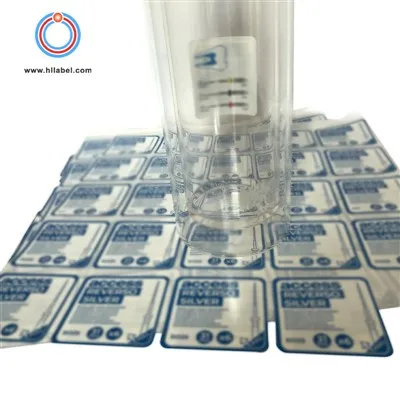
If you’re a brand owner, a packaging manager, or anyone who needs reliable multi-layer labels, you don’t have to figure this out alone. We’ve been doing this for years, testing every batch before it leaves our facility, so you can be sure your labels will hold up. We can work with you to figure out exactly what tests are right for your product—whether it’s testing layer adhesion for tamper-evident labels, substrate adhesion for waterproof labels, or durability for shipping labels. Just reach out to us, tell me what you’re working on, and we’ll walk through how we can make sure your labels perform exactly how you need them to.
Foldable Label References:
ASTM D3330, Standard Test Method for Peel Adhesion of Pressure-Sensitive Tape
ASTM D3002, Standard Test Method for Shear Adhesion of Pressure-Sensitive Tapes
Practical Guide to Pressure-Sensitive Label Adhesion, Association for Packaging and Processing Technologies (PMMI)
Huizhou Huilong Printing Company Limited
As one of the most professional multi-layer labels manufacturers in China, we have world-leading production equipment and strong manufacturing capabilities. Please feel free to buy bulk multi-layer labels in stock here from our factory. Also, pricelist is available.
Address: Xin’er Group, Xiamazhuang, Huicheng District, Huizhou City, Guangdong Province
E-mail: huilong278@163.com
WebSite: https://www.huilonglable.com/
